Friday, June 29, 2012

Battle at Helgeandsholmen 1463 #2

During the week I had the opportunety to play a game of Hail Caesar, and at last a 15th century game during the Kalmar Union War.

The Scenario for the day was a re-worked one of my "Battle at Helgeandsholmen 1463" scenario.

Background
In 1459 the Union/Danish King Christian I got the opportunity to inherit Schleswig, but he had to pay off some of he´s relatives. The price however, was astronomical, 123,000 guilders, equivalent to 30 750 silver marks or six tons of silver, and this would be borne by the Union population. All citizens in Denmark and Sweden had to pay extra taxes to cover for the cost.

The increased tax burden in Sweden met with resistance. 1463 imposed an additional tax of 12 cents for each tax farmer and 6 cents for every country people. When the Allmoge in Uppland protested violently declared Archbishop Jöns Bengtsson (Oxenstierna) that the tax was abolished.

When King Christian returned to Stockholm the Archbishop was imprisoned and taken to Denmark. Uppland Allmoge marched to Stockholm and camped on Norrmalm. Under the leadership of the Swedish Marshal Ture Turesson (Bielke) the Kings soldiers massacre the Allmoge on August 21 at the Battle of Helgeandsholmen.

The poor farmes that just live outside Stockholm are not aware of the blood bath to follow...


Here follow the Story about the battle of Helgeandsholmen from the chronicle Rimkrönikan or more exact the part called Sturekrönikan:

Our Archbishop is against the law of King Christian captured.
Evil is to live and look after. We have to go out en masse.
......
And soon was assembled a huge crowd. The farmers went out so quietly,
that no one in Stockholm heard a thing or had the slightest idea of ​​danger.
 ..... .
The city was sleeping in peace, when the army came to Norrebro,
and peasants crept without WAITING to the innermost. port on the north side.
If ladders resulted, but two or three, is not known, what could happen.
But bondeörlog is rarely to praise and said about the victory show.

Though the city not all at once could be had, however, peasants were not his journey, flawed.
It lay there, the two shared roots, the Helgeandsholmen and Brunkebergs ridge.
But all too soon the peasants would find that Stockholm was not so easy to win.

And peasants caught rebuke for his villa, to split the army in two,
and while it did not take now, before they started to sound bad.
For this, as on Helgeandsholmen low, there was no way to retreat.
Since the battle lasted half the day, it became also the foundation block,
for help from the others were not to be: The power and the enemy separated the two.
 
It went so far that the Holy Spirit Church, where a crowd of peasants managed to escape,
resounded deathcry and clash of arms instead of songs to the Lord's worship.
How pitiful than the farmer prayed and groaned, he was cut without mercy. down.
It drew not even to kill many of those who have given freely to capture.
 
But Christian's heart relent in the end, so that all the others released.

About half of the rebells up at the Brunkeberg ridge.
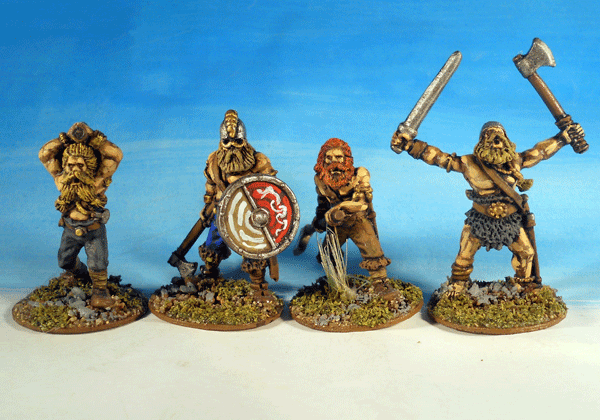
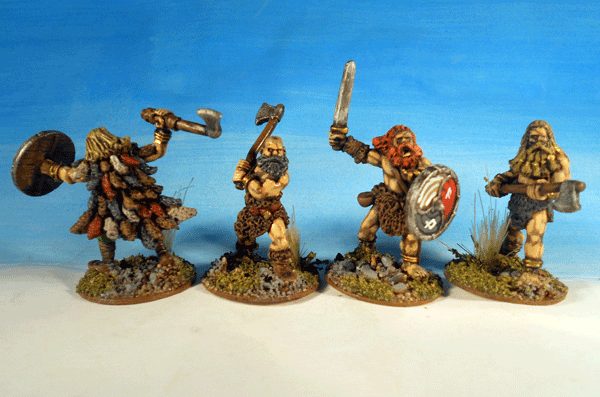
OOB rebells
Command of  C-in-C Kristiern Bengtsson (Oxenstierna) Brother to Archbishop Jöns Bengtsson (Oxenstierna)

3 Units of Allmoge

Command of Erik Nilsson (Oxenstierna) Cousin to Archbishop Jöns Bengtsson (Oxenstierna)

4 Units of Allmoge

Early in the morning the Danish Marshal Rönnow let he´s German mercenarys march out side the walls of Stockholm to subdue the rebellion...

OOB Danish/Union 
Command of Claus Rönnow, Defenders of Stockholm

2 Units of Mercenarys halberdmen
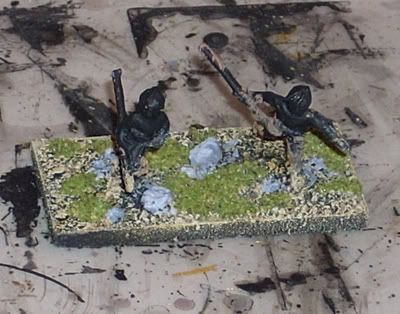
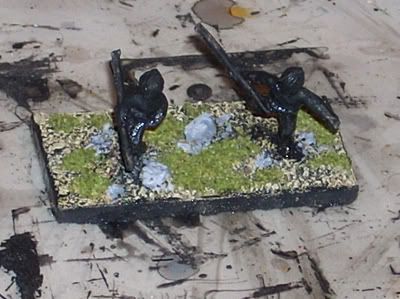
2 Small Units 
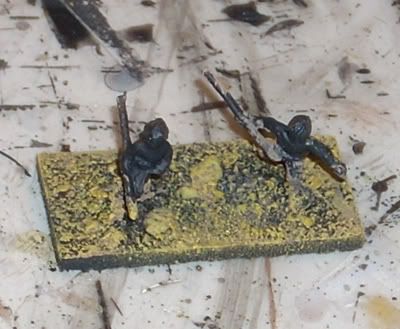
of Mercenarys crossbowmen (May use Pavises)
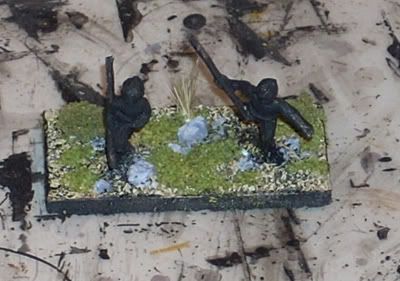
1 Small Unit of Mercenary Handguners

Command of C-in-C Ture Turesson (Bielke), Reinforcements

2 Units of Knights and Knechts
1 Small Unit of Mercenary Handguners


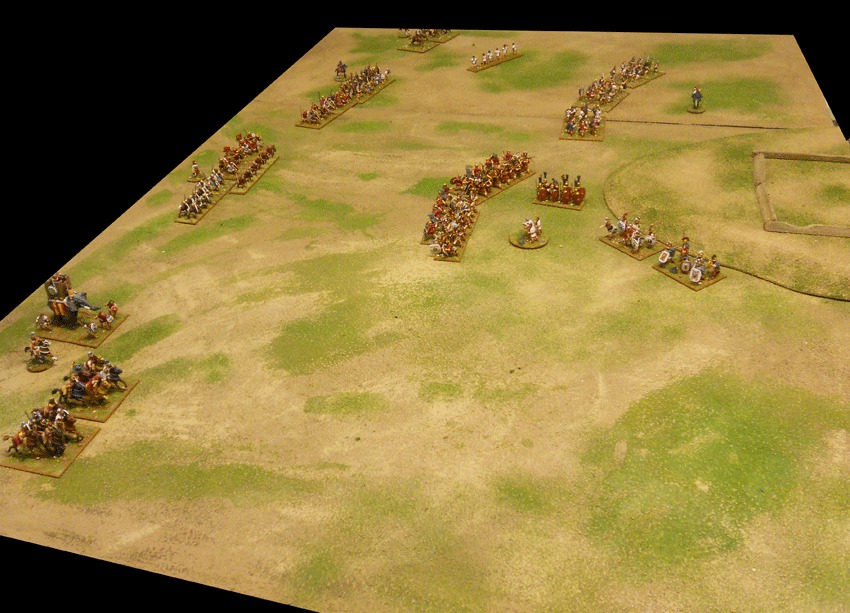
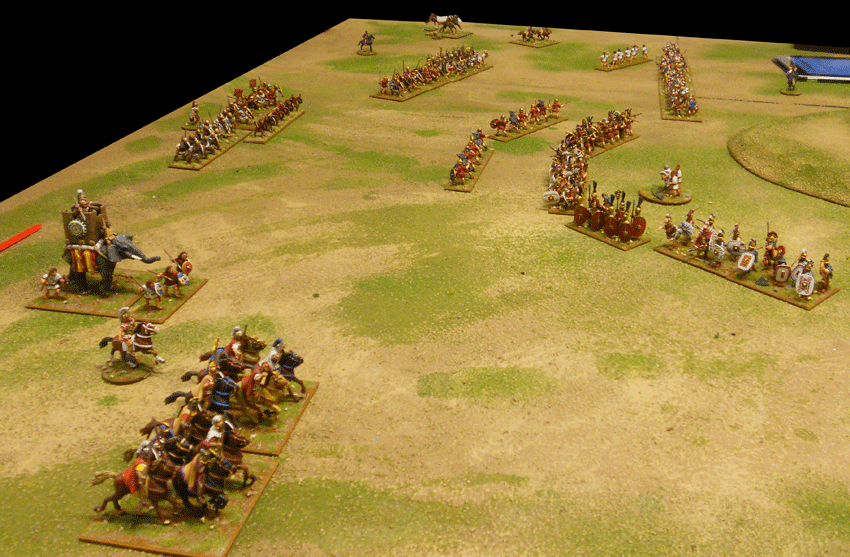
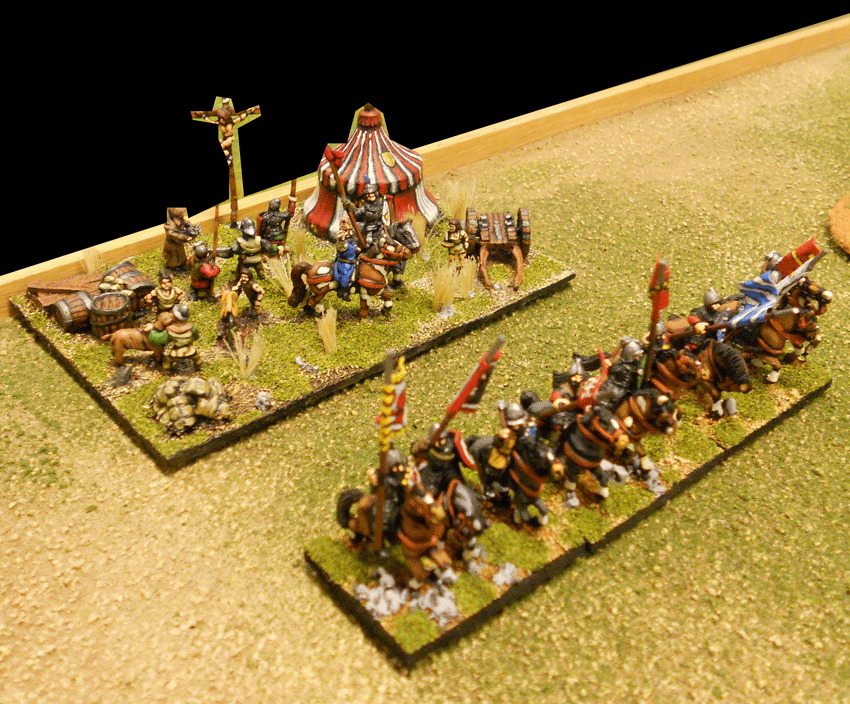
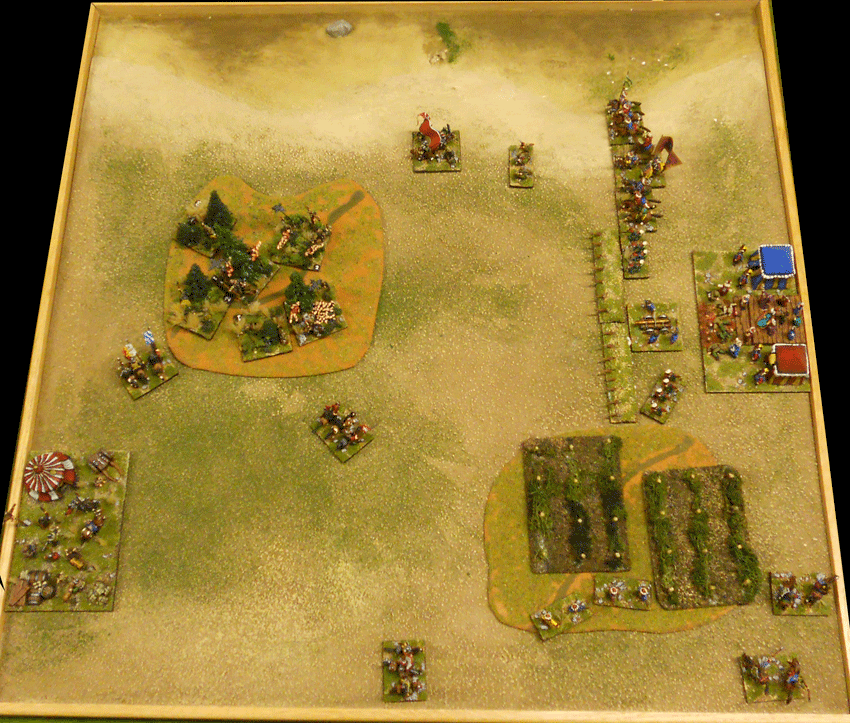
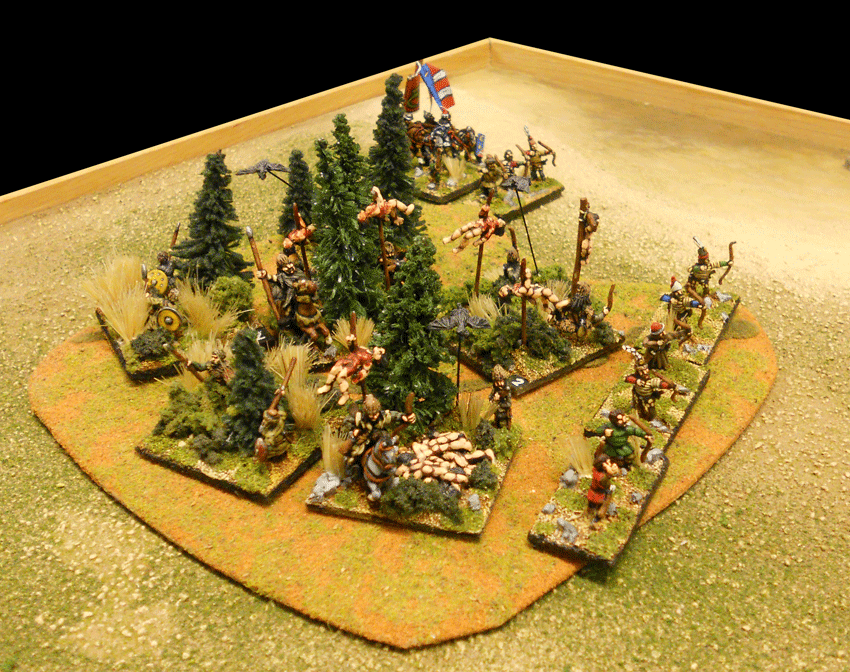
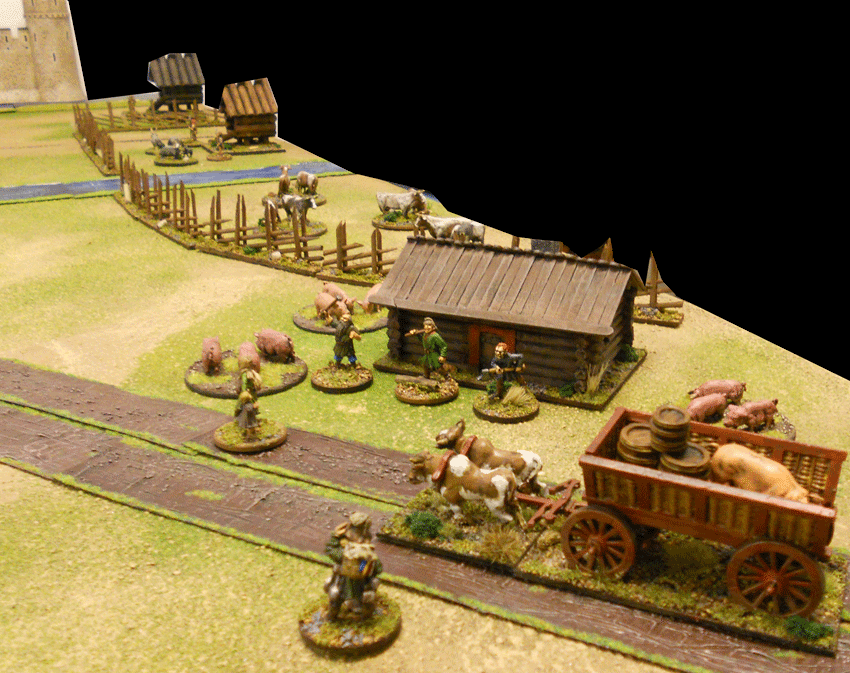
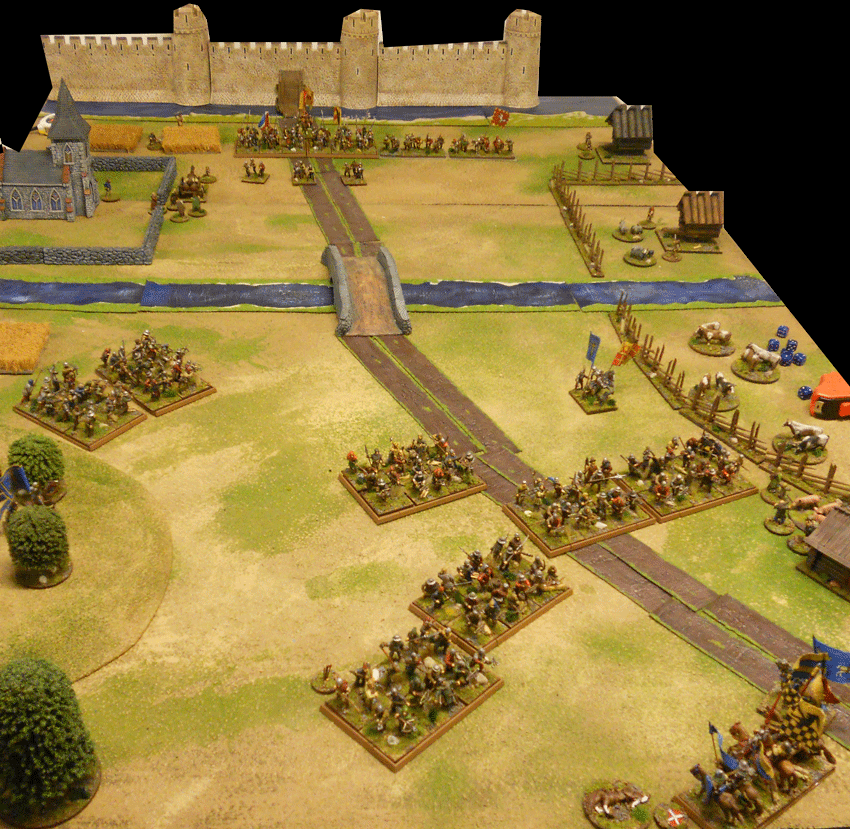
Early morning outside Stockholm in august 1463. Close to the left at the Brinkeberg ridge one part of the rebells have spent the night. the rest of the rebells managed to get over the bridge to Helgeandsholmen during the night...

Middle to the left you have the Helgeands house/chapell and in the back the city walls of Stockholm and its Danish defenders.

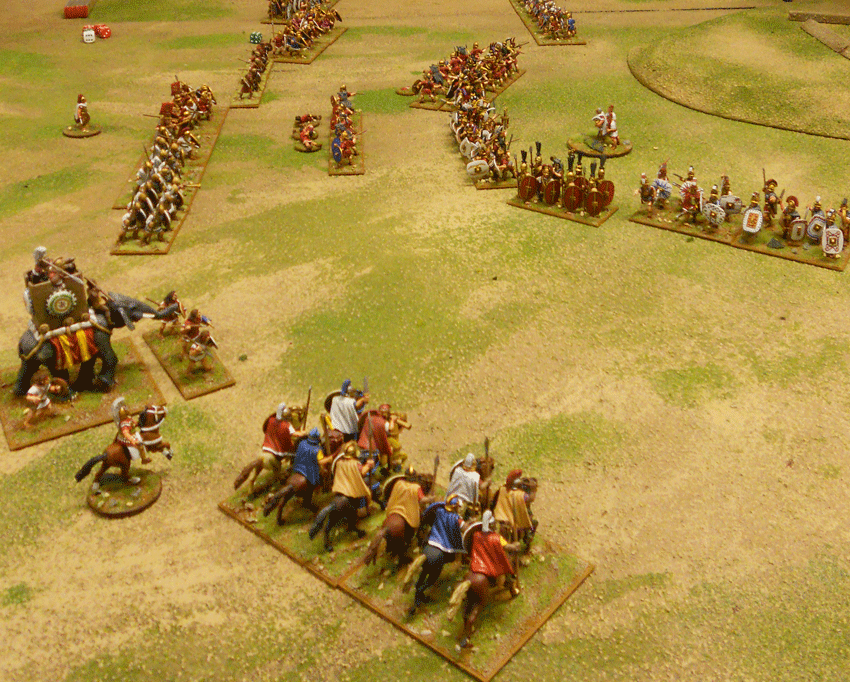
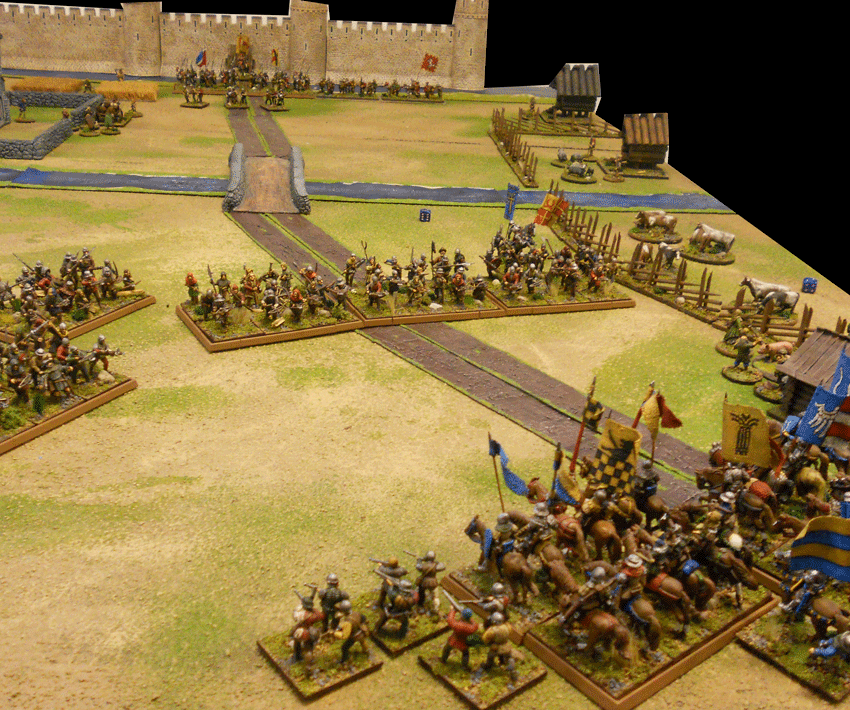
By some peculiar reason the Rebell commander ordered the allmoge soldiers that already HAD managed to get over to Helgeandsholmen to get back to the mainland...

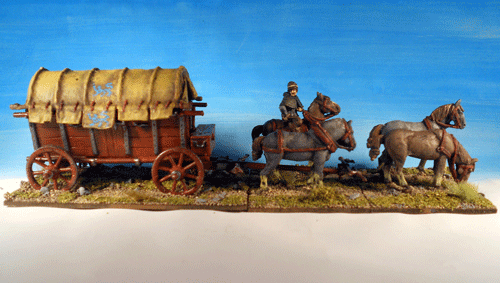
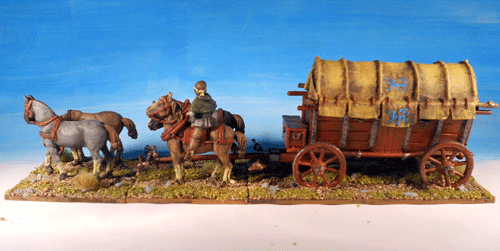
BUT it would apper to be a mastermind move as the Danish King and all hes Knights returned in the back after a small raid at the Archbishops castle...

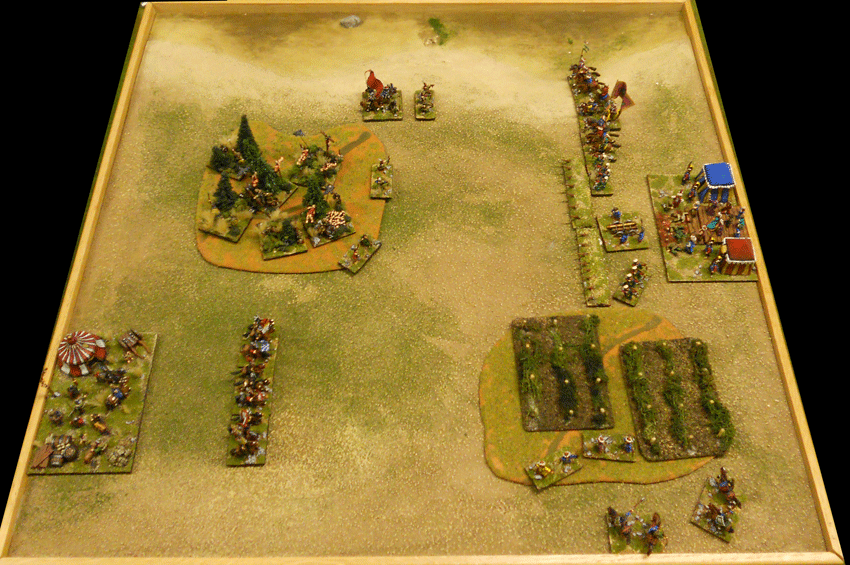
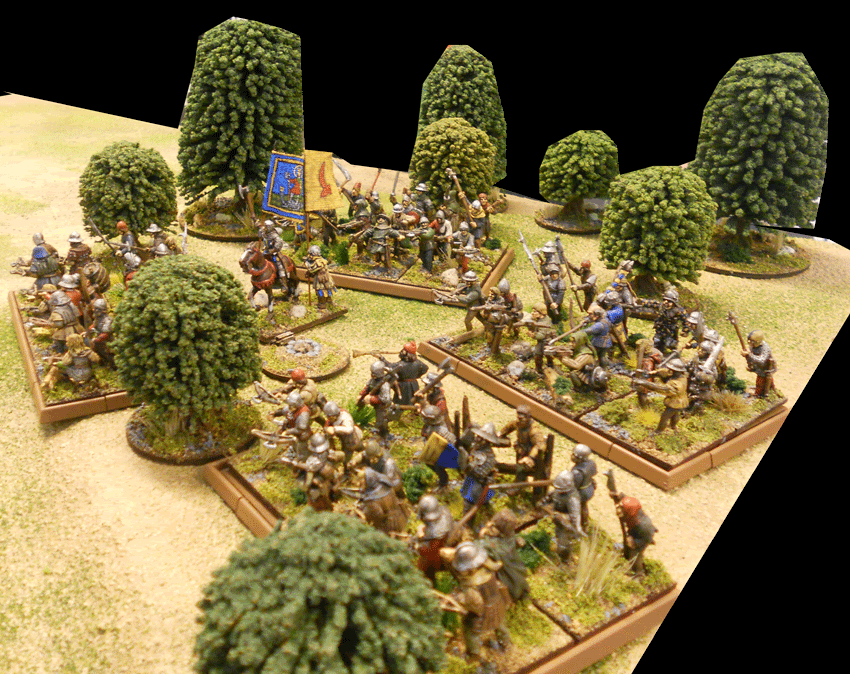
By a strike of luck the rebells had gathered a impresive force to meet the threat from the appearing Knights in the back...

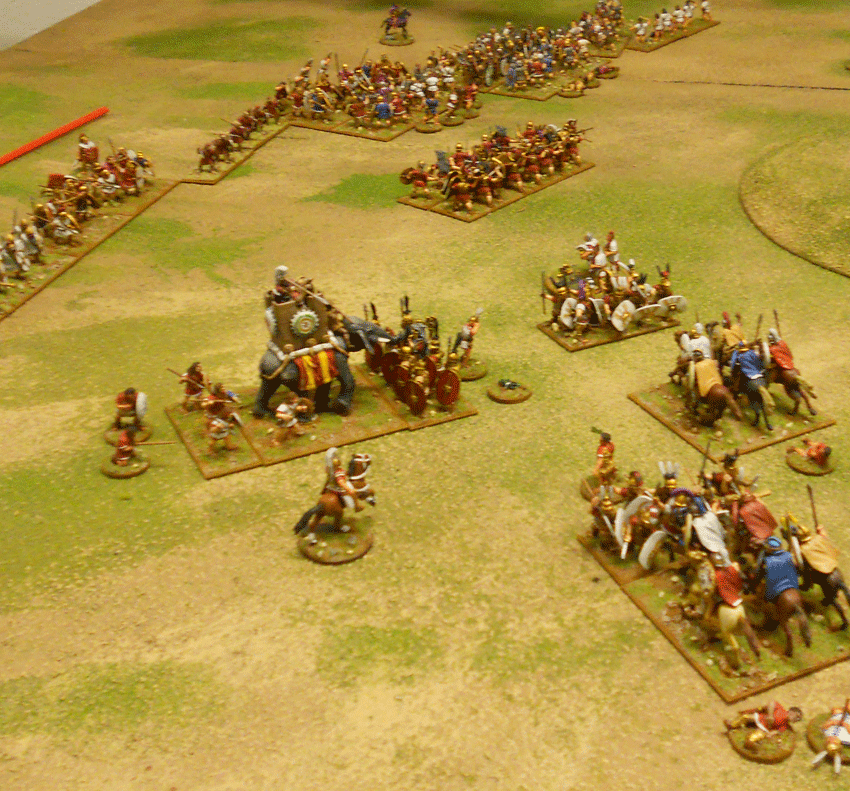
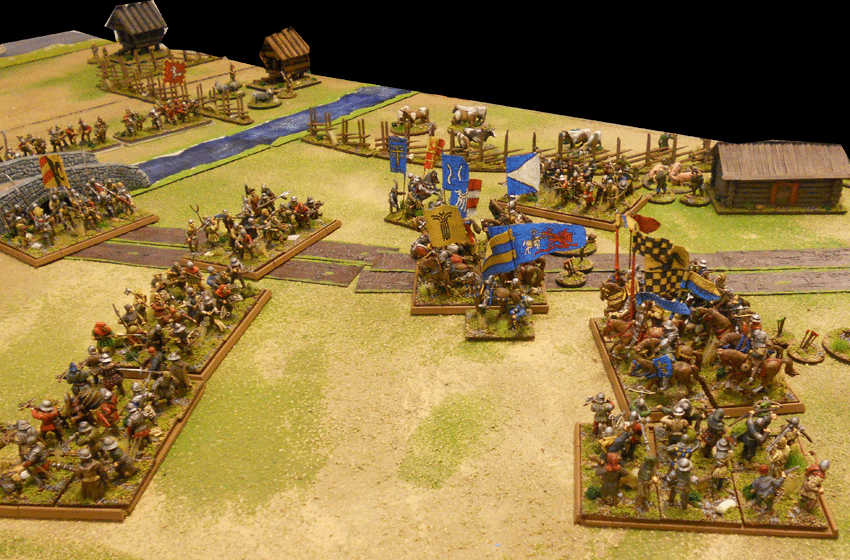
At the same time the Danish Marshall tryed to no vain to get he´s mercenarys to advance...probably to early in the morning or to low pay...

The Danish Knights had to endure a hail of crossbowbolts from the Allmoge soldiers, soon starting to cause several damages... The knights was short of time, but due to poor command they didn´t manage to get a chanse to charge...

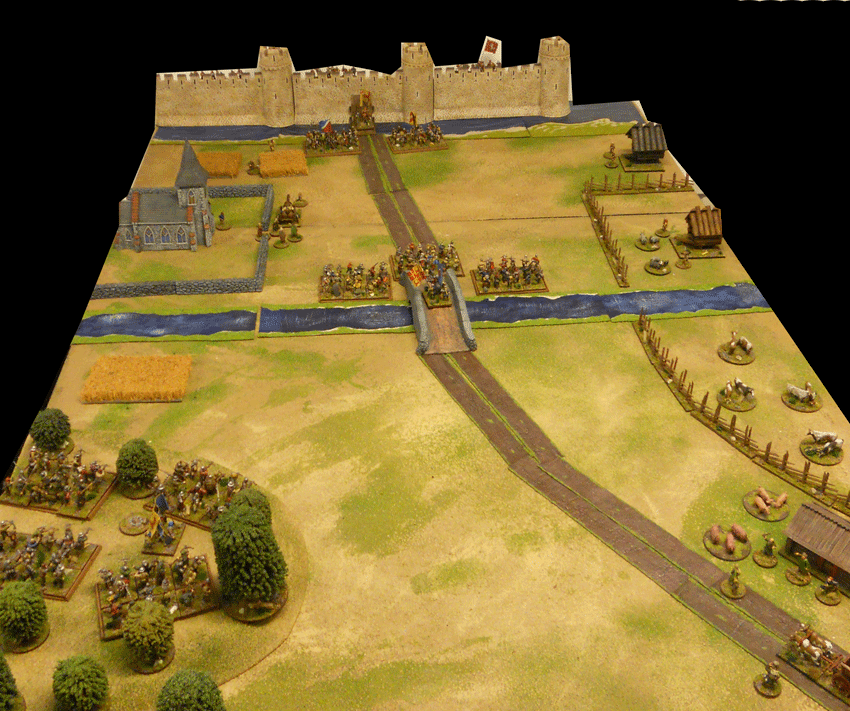
The Danish infantry still standing out side the city walls of Stockholm...

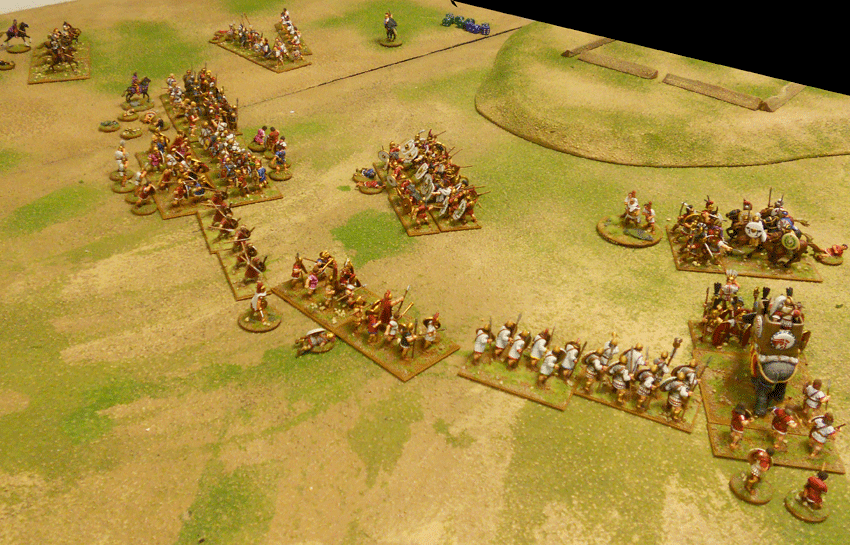
At last the Danish Infantry was advancing to help the Knights to subdue the rebellion and save the kings loot.

The Allmoge continued to shoot att the poor knights, the mercenary handgunners fledd the field and but one of the Knight units made a headlong charge driving the Allmoge as cattle...

The Danish Infantry managed to get to the bridge but to late... During it´s wait and slow advance the rebells had poured crossbow bols at the knights and soften them up before they charged them from all directions...

The Battle was a lost cause for the Danes, the King managed to get by to safty within the walls of Stockholm, but without his loot from the Archbishops estate...

It was a nice game but I will rework some of the stats for the different units, especially now then I gor the new army book as a guideline :)


Wednesday, June 27, 2012

Dux Bellorum Flyers...

Dan Mersey, the authour of the upcoming Arthurian Rules, Dux Bellorum, sent me some realy nice flyers for the game.

Front page was the cover of the rulebook and on the back a short intro about the game, same text as on the Ospry site AND a Dux Bellorum Army Roster, could come in handy:)


Dux Bellorum Army Roster

I also nickt some page spread from the upcoming rule book from Dans blog...


It sure look mighty fine to me, realy looking forward to the release of the rules, althought I never tested them. Even started to fix up my old dark age minis for the first games later this summer:)


15mm Basing tutorial

I have had some questions about how I make my 15mm bases, so here is a tutorial.

Step 1: Superglue the minis to a base, I use 2mm MDF.
 
 
Step 2: Use PVA glue to attach sand to the base. I use Citadel sand code 66-42 (But Citadel have recently changed the zize of the sand so a sligthly bigger sort...)

Step 3: Undercoat in black. I use Citadel Sparypaint.

The old brushes I use.

Step 4: Drybrush with Vallejo U.S.A. Tan-Earth 134/874. Or get some cheap water based brown paint.

Step 5: Brybrush with Vallejo Ochre Brown 127/856. Or get some cheap water based ochra/yellow paint.

Step 6: Drybrush with Vallejo Buff 120/976

Step 7: Paint some rocks with Vallejo London Grey 161/836.

Step 8: High light the rocks with Vallejo Medium Sea Grey 158/870

Step 9: Use PVA glue and Flock the Base with Gren Flock. I use Citadel 66-41

Step 10: Tidy up the minis and the base edges with black.

And now it is just the painting of the minis left:)


And here you can find out how I base my 28mm minis...


Good Luck !

Tuesday, June 26, 2012

Movement trays

I been working on some movement trays for my 15th century minis, i.e.my Kalmar Union War project.

Got me some of the Games Workshop, Warhammer Modular Movement Tray Set and built me a bunch. The set was realy easy to use and in a short time I got me some nice trays for tonights game, AAR to follow...


Saturday, June 23, 2012

Battle of Ilorka 211BC

Last week we played some Hail Caesar for the first time in a month...or a year...

We decided to play my last of 5 Scenarios based on the the Punic war in Spain. This time the final clash at the Battle of Ilorka 211BC.

After the defeat of Hasdrubal Barca in the Battle of Dertosa/Iberia in the spring of 215 BC, the Romans had secured their bases in the north of Ebro. They then proceeded to win over some Iberian tribes, raid Carthaginian lands in the South of the Ebro. Hasdrubal meanwhile had been reinforced by 2 armies, respectively led by his younger brother Mago Barca and Hasdrubal Gisco. These armies fought several indecisive battles with the Scipio brothers during 215-211 BC. 

This elephant did not take part in our battle, but it is painted by Bjorn that painted all the minis we used in our game, and I think it´s realy lovely and needed to be shown:)

Back to the game...

The Scipio brothers had hired 20,000 Celt-Iberian mercenaries to reinforce their army of 30,000 foot and 3,000 horse. Observing that the Carthaginian armies were deployed separately from each other, with Hasdrubal Barca and 15,000 troops near Amtorgis, and Mago Barca, Hasdrubal Gisco with 10,000 troops each further to the West of Hasdrubal, the Scipio brothers planned to split their forces. 

Publius Scipio decided to take 20,000 Roman and allied soldiers and attack Mago Barca near Castulo, while Gnaeus Scipio took one double legion (10,000 troops) and the mercenaries to attack Hasdrubal Barca. This stratagem would lead to 2 battles, the Battle of Castulo and the Battle of Ilorca to take place within a few days of each other...

OOB Rome
Gnaeus Division: C-in-C, Gnaeus Scipio
4 Small Units of Hastati and principes
1 Small Unit of Triarii
2 Small Unit of Velites
1 Unit of Italian allied infantry (Deployed in the Roman camp)

Abylix Division: General, Abylix (Unreliable Iberian allied)
2 Unit of CeltIberians - Medium infantry warband
1 Unit of Iberians – Medium infantry
1 Small Units of Baleric slingers - Skirmish infantry

OOB Carthaginians
Hasdrubal Barcas Division: C-in-C, Hasdrubal Barca
1 Unit of Lybian veterans - Heavy infantry
1 Unit of allied infantry - Medium infantry
1 Small Unit of allied skirmishers - Skirmish infantry

Masanissas Division: General, Masanissa
2 Small Units of Numidians – Light Cavalry

Hasdrubal Giscos Division: General  Hasdrubal Gisco
2 Units of allied infantry - Medium infantry
1 Small Unit of Baleric slingers - Skirmish infantry

Magos Division:  General, Mago
2 Small Units of Cavalry - Medium cavalry
1 Unit of Elephants – Elephants
1 Small Unit of allied skirmishers - Skirmish infantry (Sub-unit to Elephants)

The Romans started with the main part of the army in march column, with just some Italian allied infantry working on a small camp.

The Carthaginians started ofboard with only Masanissa´s command on the board.

The Carthaginians made some god command rolls and moved on the battle field in force...

The Romans respondend accordingly by by order the column to form a battle line...But it seemed like Abylix command had other thoughts and continued to move away from the threat....treason???

A douptful order by the Romans was to order the Italian Allied in the fortification on the hill to leave it and join the main battle line...

The Carthaginians continued their swift advance, aiming to outflank the smaller roman army...

The romans sent out some skirmishers while the rest of the army awaited just below the hill... they also managed to get the Iberian allied in to a battle line to.

The Carthaginians closed in and started to chase away the roman skirmishline... The romans thought they would let loose the Celtiberian warbans but they refused to move against the Carthaginians...

The Carthaginians right flank with Elephants and Cavalery engaged the Roman leftflank, routing the  Italian allied and turned on the roman legions...

On the other flank the roman at last convinced the celtiberian allied to CHARGE! It all become a bloody battle but the Carthaginian troops managed to endure...

The Carthaginians pressed forward and the Romans battle line started to collapse...

We called it a day sins the roman losses was to greate and they would not have managed to stop the Carthaginians forces.

Our greatest concern was way the roman commanderd did leave their fortification on the hill and did deploy the battle line below the hill iand not on it...

It was realy nice to play hail Caesar again, absolutely one om my favourite rules. Next time ther will be some 15th century gaming during the Kalmar Union War:)


Friday, June 22, 2012

Midsummer in Sweaden...again...


Happy Midsummer:)

Today it is Midsummereve here in Sweden, here are once again the IKEA banned commercial about the Swedish Midsummer...not realy true, but quite entertaining anyway;)

Sunday, June 17, 2012

Medieval ferrari ?


The last days I been working on a supply wagon for the Danish forces invading Sweden during the 15th century.

As it is the Danish Kings personal supply wagon with stunning 4 horsepowers, I suppose it is the Ferrari of the medieval time...

Minis ofcourse from Perry miniatures.


As the wagon are a convertible it work mighty fine during drive by shootings;)

Wednesday, June 13, 2012

Picea abies

The last days I been basing some Spruces, they are primary for my Northern 15th century setting...i.e. The Kalmar Union War:)

You could never get to many trees in the forest...

Saturday, June 9, 2012

Berserkers

The last 8 minis from this commission:) BERSERKERS !!!

Minis are from Foundry.


Wednesday, June 6, 2012

Scottorum Malleus Playtest #4


Here are one more AAR from playtest game of Dan Mersey, authour of the upcoming Dux Bellorum, latest (under development) wargaming rules "Scottorum Malleus".

The rules are a set of medieval wargaming rules. The size of armies/number of bases is similar to Dux Bellorum and the rules are of similar simplicity, but most of the mechanisms are different.

Dan just recently started a blogg in support for he´s books and wargaming rules, please make him a visit; merseybooks.

Back to the AAR... In this game I and my friend Molgan decided to try out the condensed format i.e. DBA size of tha gaming table and 40mm front for the units i.e. 1 ordinary DBx base.

The minis we used was from my friend Oskars collection of lovely painted Balcan armys, unfortunally they are not used that often...

OOB 
In the OOB I uses the common DBx classification for the troop types...

Wallachians
1x Cv (Vlad Tepes, General)
3x Cv
4x LH
1x Archers
3x Ps

Not the entire Wallachian army but a close-up of their camp an 3 units oc Cavalry.

Ottomans
1x Cv (Qapu Khalqis, General)
2x Cv
2x LH
2x Bw (Janissaries)
2x Ps
1x Art (Heavy)


The Ottoman camp with Sultan Mehmed II and entourage, infront you can see the Ottoman fortifications defended by Heavy artillery and Janissaries.


Set-up...


Due to better and more expencive units (Janissaries and Qapu Khalqis) and field fortifications the Ottoman army was a little smaller 10 bases vs 12 for the Wallachians. 

But with the wather line on one flank and the field fortifications in the middle the Ottoman managed to comver most of the front. 

They were concentrating their cavalry forces on thirs right flank and just having some skirmishing Azab archer to protect the left flank.

The Wallachian was aiming for a flank move around the vineyard on the Ottoman left and attack the Ottoman camp and fortification from the side...

To screen of the Ottoman Cavalry they sent some Archers and Skirmishers under harsh command of Vlad himself.

In "Scottorum Malleus" Skirmishers and Light Horses may deploy further in on the table then ordinary fighting troops.


Opening stages of the battle...


The Wallachian Light Horses made a ruch to get around the Vineyard but was ofcourse engaged in a skirmish fight with the Ottoman Azabs protecting the Ottoman left flank. 

One unit of the Wallashian Light Horses got close to the Camp but was shoot to pieces by a unit of Janissaries that had left the field fortification to protect the Ottoman left.

The rest of the Wallachian army just waited... exccept for the poor Archers that was driven forward by Vlad, that wanted them within shooting distance to the Ottoman cavalry...

The Ottomans just waited...exccept for their 2 units of Light Horses that quite fast was were down by the Ottoman Skirmishers just in front of the Ottoman Fieldfortifications but also giving the Artillery a chanse to shoot everything that got a little to close...

I looked as the Ottomans had the uperhand at the moment, well protected by their field fortifications...

Losses:
Wallachian: 2x LH, 1x Ps
Ottoman: 2x LH


Middle stages of the battle...


The Wallachians press forward with the poor archers, that starts to shoot volly after volly at the Ottoman Cavalry without any success...

The Wallachian light horses ride away from the pointless skirmish with the Ottoman Azabs aiming to raid the Ottoman camp...

The Wallachian Cavalry breakes their fine formation and the 3 units ride of in 3 different direction...

The Ottoman still await their time...just letting the Janissarie archery and the Heawu artillery work on the enemys...

Losses:
Wallachian: 2x LH, 1x Ps, 2x Ps
Ottoman: 2x LH, 


The end of the battle...


To attack the Ottomans in prepered field fortifications is not a good ideea... But the Wallachians Light Horses made it arround the flank and started to were down the defenders, a unit of Janissarie was unbelievable taken out by them as was the Ottoman Artillery.

Meanwhile the remaning Janissarie unit managed to eliminate the wallachian Archers and the Ottomans Cavalry took advantage of the opportunety to charge Vlad himself... After a fierce battle the Ottomans was on top...The remaning Wallachians retreated of the battlefield...Ottoman Victory!

Losses:
Wallachian: 2x LH, 1x Ps, 2x Ps, 1x Bw, 1x CV(Gen)
Ottoman: 2x LH, 1x Bw, 1x Art, 1x Cv


Debriefing...


One again a very intense and entertaining game of "Scottorum Malleus". The rules work very smoth and give good gaming results. As the losses shows it was a very close call for the Ottomans only having to loose one more unit to loose the day...

The rules worked fine in this condenced/DBA size to giving a totaly different game compared to DBA, more fluid and fast paced, totaly in my taste.

As with DBA this size of game dosen´t realy look like a battle to me...to few minis on each base, probably look better with 10mm or 6mm minis so you get the feel for the armys moving around. But as a "learn the rules" or "I dosen´t have the space" game it work well...rather a small game but no game att all;)